Vegetables
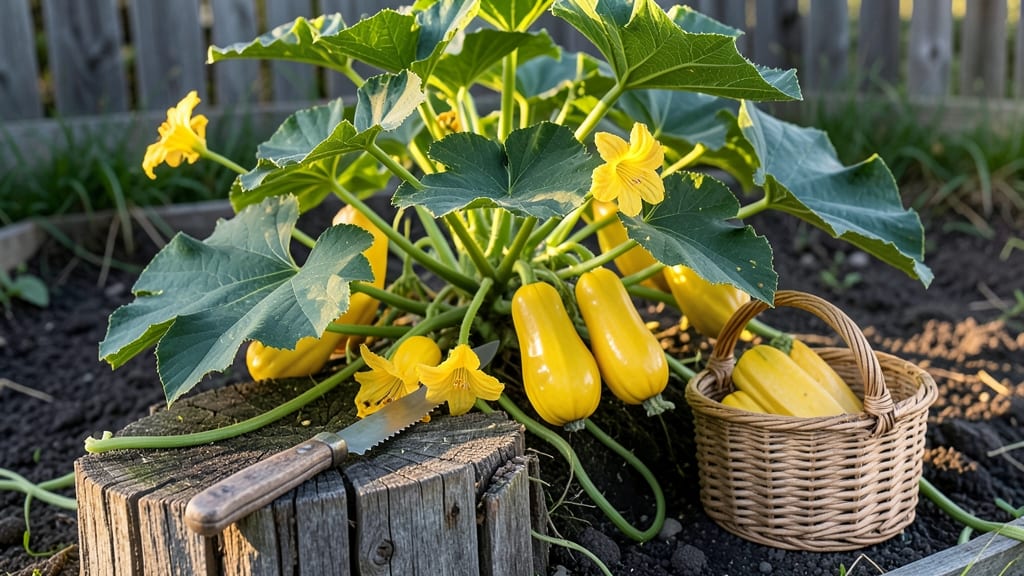
Harvesting yellow squash at the right moment transforms your garden into a flavor explosion—sweet, tender, and ready to eat in minutes.
Picture this: you’ve nurtured your 🍆 yellow squash all summer, and now the moment of truth arrives. One wrong move, and you’re left with tough, seedy disappointment. But get it right, and you’ll enjoy a steady harvest all season long.
Knowing when to pick isn’t just about size—it’s about color, texture, and even the stem. A squash that’s too small or too large can ruin the taste, and missing these cues means wasted effort.
Below, I’ll walk you through the exact signs to look for, the best tools to use, and how to keep your plants producing like crazy.
From avoiding common mistakes to storing your harvest properly, this guide covers everything you need to turn your yellow squash into a garden highlight—no more guesswork, just perfect picks every time.
When to harvest yellow squash for optimal flavor and texture
Yellow squash is one of those summer garden stars that rewards patience with sweet, tender flesh and delicate flavor. But timing your harvest is everything—pick too early, and you’ll get bland, seedy disappointment.
Harvest too late, and the skin toughens while the inside becomes woody and bitter. The secret lies in mastering four key indicators of peak ripeness: size, color, skin firmness, and seed development.
Most gardeners make the mistake of waiting until the squash looks "fully grown," but by then, it’s often past its prime. The best yellow squash for eating is actually smaller than you think—typically between 6 to 8 inches long.
At this stage, the squash is packed with natural sugars and hasn’t yet diverted energy into seed production. Think of it like catching a fish at its prime—too small, and it’s not ready; too large, and it’s overdone.
Here’s the golden rule: Harvest yellow squash when it’s 6 to 8 inches long, with a deep, consistent yellow color and a hard, dull skin. The stem end should also turn from green to yellow, signaling maturity.
If you miss this window, the squash will keep growing, but the texture will degrade rapidly, and the seeds will harden, making it less enjoyable to eat.
One of the easiest ways to test ripeness is the thumbnail trick. Press your thumbnail into the skin of the squash. If it doesn’t leave a dent, the squash is ready to harvest. If it does, give it a few more days.
This simple test saves countless underripe squash disasters and ensures you’re picking at the perfect moment. I’ve learned this the hard way—once, I harvested a batch that was still too soft, and the flavor was mild and watery compared to the sweet, nutty taste of properly ripened squash.
Another critical sign is the stem end color. When the squash is ready, the stem end will turn from green to yellow. This color change indicates the squash has reached its sugar peak. If you see a green stem end, the squash needs more time.
Conversely, if the stem end is brown or shriveled, it’s past its prime. Paying attention to this detail can transform your harvest from mediocre to outstanding.
Overripe yellow squash is a common pitfall, especially for beginners who think "bigger is better." But once a squash grows beyond 8 inches, the skin becomes tough and leathery, and the inside develops large, hard seeds. The flavor also shifts from sweet to bitter and fibrous.
To avoid this, I recommend harvesting every 2–3 days during peak production. This frequent picking encourages the plant to produce more squash instead of letting a few grow too large.
If you’re unsure whether your squash is ready, err on the side of harvesting slightly early. Underripe squash can still be used—it just needs a little more time to ripen indoors if needed.
Place it in a paper bag with a banana or apple to speed up ripening (the ethylene gas helps). Overripe squash, however, is nearly impossible to salvage for eating, though you can still use it for seeds or compost. Trust your instincts and prioritize consistency over size.
Pro tip: Use a sharp knife or pruning shears to harvest, leaving a small stem attached. This prevents damage to the vine and encourages more production. Avoid twisting or pulling the squash, as this can harm the plant.
I’ve found that harvesting in the morning is ideal—this gives the squash time to recover before the heat of the day, and the flavor is often at its peak after a cool night.
Finally, keep an eye on the plant’s overall health. If the vines start to yellow or wilt, or if you notice fewer flowers, it may be time to slow down harvesting.
Yellow squash plants have a finite production window, typically between 60 and 70 days after planting. Once the plant starts to decline, focus on harvesting what’s left and letting the remaining squash mature fully for seed-saving or storage.
With these indicators in mind, you’ll never again miss the sweet spot for harvesting yellow squash. The key is to stay consistent, observant, and proactive. Your garden
Step-by-step guide to harvesting yellow squash without damaging the plant
Harvesting yellow squash correctly keeps your plants producing for weeks—not just days. The wrong technique can stress vines, invite pests, or even stop future fruit growth. I’ve learned that a sharp cut and gentle touch make all the difference in maintaining a bountiful harvest.
Using the right tools and timing isn’t just about getting the best squash—it’s about preserving your plant’s health. Overharvesting or rough handling can weaken vines, leaving them vulnerable to disease.
Let’s break down the exact steps to harvest without harm, so you can enjoy a continuous supply of tender, flavorful squash all season.
- 1 Choose the right tool: Use clean, sharp pruning shears or a sharp knife. Dull tools crush stems, inviting rot.
- 2 Locate the stem: Find the fruit stem (not the vine stem). It’s the small nub where the squash attaches—this is where you’ll cut.
- 3 Cut cleanly: Make a diagonal cut 1/4 inch above the stem. Avoid twisting—this tears tissue and stresses the plant.
- 4 Leave the stem: Never pull squash off—this damages the vine. A clean cut heals faster and encourages new fruit to form.
- 5 Harvest strategically: Pick every other squash if vines are heavy. This prevents overburdening and ensures continuous production.
- 6 Sanitize tools: Wipe blades with rubbing alcohol between cuts to prevent spreading disease from plant to plant.
After harvesting, let squash cure in a shady, dry spot for 1-2 hours. This hardens the skin slightly, improving storage life. I store mine in a single-layer tray in the fridge—this prevents bruising and keeps them fresh for up to 1 week.
If you notice vines slowing production after harvest, it’s time to prune old leaves and add a balanced fertilizer. This gives your plants the energy to bounce back and keep yielding throughout the season. A little care now means more squash later!
Remember: consistency is key. Harvesting every 2-3 days during peak season keeps plants productive. Skip a day or two, and you’ll end up with a flood of overripe squash—so stay on top of it! 🌱