Vegetables
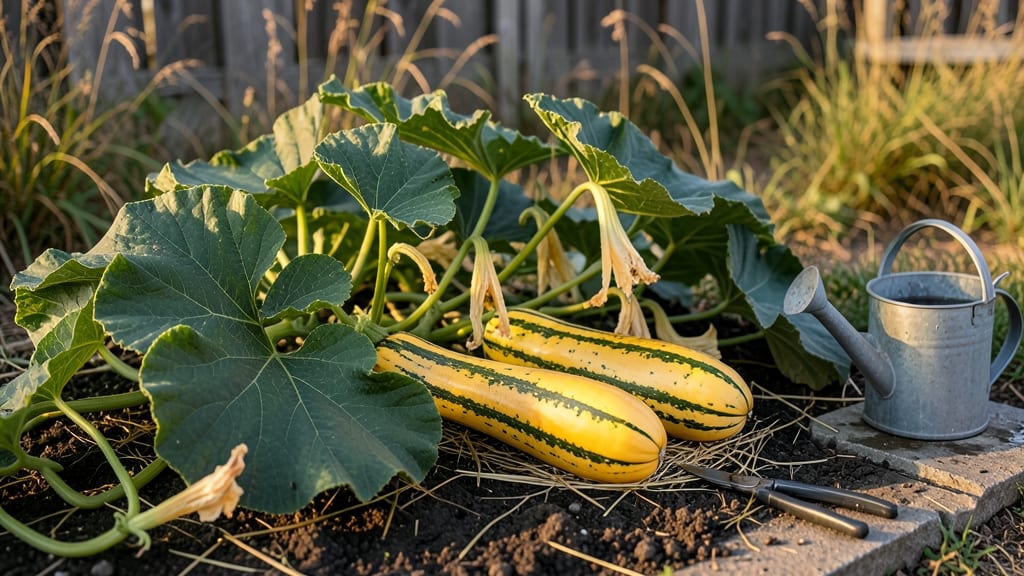
Growing yellow squash with green stripes means summer harvests of crisp, sweet vegetables that look like sunshine. 🌞 I've grown this variety for years, and the secret to success starts with warm soil and full sun—no fancy equipment needed, just patience and the right timing.
Plant seeds after your last frost when soil reaches 70°F, spacing them 2-3 feet apart in rows 4 feet apart. These vines spread wide, so give them room to stretch. Water deeply at the base (not the leaves) to prevent disease, and mulch to keep moisture steady.
You'll see squash forming in 50-60 days, ready to pick when they're 6-8 inches long and still firm.
Watch for squash vine borers—those telltale holes mean it's time for organic controls like row covers or neem oil. Overcrowding leads to bitter fruit, so thin seedlings early. With consistent care, you'll harvest 10-15 pounds of squash per plant all summer long. The first bite is always the best reward!
📚 In This Guide
- What you need
- Instructions
- Tips and common mistakes
- Wrapping up and next steps
What you need
- ● Seeds: 1–2 packets of yellow squash with green stripes seeds (e.g., 'Golden Zucchini' or 'Straightneck' varieties). Start with 3–5 seeds per plant for better success.
- ● Potting soil: 1–2 bags of high-quality, well-draining seed-starting mix (or compost-enriched garden soil if planting directly outdoors).
- ○ Containers (optional for early starts): 3–4 biodegradable pots (3–4 inches deep) or seed trays with drainage holes.
- ● Fertilizer: A balanced, organic fertilizer (e.g., 10-10-10 or compost) to boost growth. Avoid high-nitrogen blends.
- ● Watering can or hose: With a gentle spray nozzle for seedlings.
- ● Garden space: Full sun (6–8+ hours daily) and well-draining soil with a pH of 6.0–7.0. Raised beds or mounds work great!
- ● Trowel or transplanting spade for digging and relocating seedlings.
- ● Mulch (straw or black plastic) to retain moisture and suppress weeds.
- ○ Trellis or stakes (optional) if growing bush varieties—though most yellow squash sprawl, vining types benefit from support.
- ● Gloves for handling prickly vines (if needed).
- ● Weather check: Wait until soil is at least 60°F (15°C) before transplanting—frost kills squash!
Step-by-step instructions for growing yellow squash with green stripes
Ready to grow this vibrant squash? Here’s my foolproof method for healthy plants and bountiful harvests.
🌱 Step 1: Choose the Perfect Planting Location
Yellow squash with green stripes thrives in full sun, so pick a spot that gets at least 6-8 hours of direct sunlight daily. I always test my garden bed first—if the area gets afternoon shade for more than 2 hours, the squash will struggle to produce fruit. The soil should also be well-draining; squash hates soggy roots.
If you’re planting in containers, use pots at least 12 inches deep and 18 inches wide per plant. Place them in a sunny spot, like a south-facing patio or balcony. The key is warmth—squash needs soil temperatures of 60°F or higher to germinate properly. If your spring is cool, wait until after the last frost or use a black plastic mulch to warm the soil faster.
🌿 Step 2: Prepare Soil and Plant Seeds or Transplants
Work 2-3 inches of compost into the top 6 inches of soil to enrich it with nutrients. Squash is heavy feeders, so I also mix in a balanced organic fertilizer (like 5-5-5) at planting time. If your soil is heavy clay, add sand or perlite to improve drainage—waterlogged roots lead to rot.
For direct sowing, plant 2-3 seeds per hill, about 1 inch deep and 3 feet apart. If you’re transplanting seedlings, bury them just below the first true leaves. I always water deeply right after planting to settle the soil around the roots. Watch for first true leaves in 7-10 days—that’s your signal the seeds have sprouted successfully.
☀️ Step 3: Water and Maintain for Optimal Growth
Keep the soil consistently moist but not soggy—squash plants need about 1 inch of water per week, but more during hot, dry spells. I water early in the morning to reduce evaporation and fungal risks. Avoid wetting the leaves, as this can cause mildew. Instead, water at the base of the plant using a soaker hose or drip irrigation.
When plants are 4-6 inches tall, side-dress with compost or a nitrogen-rich fertilizer to encourage bushy growth. Mulch around the base with straw or shredded leaves to retain moisture and suppress weeds. You’ll know your squash is thriving when it develops large, vibrant leaves and strong vines—this usually happens within 4-6 weeks after planting.
✂️ Step 4: Harvest at Peak Ripeness for Best Flavor
Yellow squash with green stripes is ready to harvest when it’s 6-8 inches long and the skin is smooth and shiny. I check my plants every 2-3 days in peak season—if left too long, the squash turns tough and seedy. Use a sharp knife or pruners to cut the fruit from the vine, leaving a small stem attached.
Harvesting encourages more production, so don’t skip this step! Store squash in a cool, dry place (like a pantry) for up to 2 weeks. For continuous harvests, pick 2-3 squash per plant weekly—this keeps the plant focused on producing more fruit instead of maturing a single large one.
🌿 Step 5: Extend the Season with Simple Care
To keep your squash producing late into the season, remove any yellow or diseased leaves immediately. Squash plants are prone to powdery mildew, so I spray them weekly with a mixture of water and baking soda (1 tablespoon per gallon) as a preventative measure.
If frost threatens, cover plants with frost blankets or harvest everything before temperatures drop below 40°F. With proper care, one plant can yield 8-10 pounds of squash over the growing season—plenty for fresh eating, grilling, or preserving!
Tips & tricks for growing vibrant yellow squash with green stripes
Here's what nobody tells you about growing this sun-loving squash variety—these tricks make all the difference between a decent harvest and a bountiful one.
Sunlight Strategy: While 6-8 hours of direct sunlight is ideal, I've found that positioning your plants slightly west of true south can actually extend their sunlight exposure by up to 30 minutes in the afternoon—critical during cloudy days. If you notice your squash growing lanky or pale, it's getting too little light. Consider adding a reflective surface like white plastic sheeting on the east side of your plants to bounce extra light onto their leaves.
Soil Temperature Hack: The 60°F soil temperature requirement isn't just about germination—it's also when your squash plants start developing roots aggressively. I use a soil thermometer to monitor temperatures, and if they're below 60°F, I cover the planting area with clear plastic for a few days to trap heat. This jumpstarts root growth, which means faster establishment and earlier harvests. The first true leaves should appear within 7-10 days of proper soil warmth.
Watering Wisdom: The 1 inch per week watering guideline can be tricky in hot climates. I've learned to check soil moisture by pushing my finger 1-2 inches into the soil—if it feels dry at that depth, it's time to water. Morning watering is crucial, but I also add a second watering session in the late afternoon during heatwaves. This prevents stress that can lead to blossom-end rot, even though the instructions don't mention this specific issue.
Harvest Timing Secret: Those 6-8 inches might seem like a wide range, but I've found the sweet spot is actually 7-7.5 inches for peak flavor. At this size, the squash is tender, the seeds are still small, and the skin has that perfect balance of firmness and smoothness. Harvesting at this stage also encourages the plant to produce more fruit continuously—you'll get that 8-10 pound yield per plant mentioned in the instructions, but with better quality squash throughout the season.
Pro Tips for Yellow Squash With Green Stripes
- Here's what nobody tells you about growing this sun-loving squash variety—these tricks make all the difference between a decent harvest and a bountiful one.
- If you notice your squash growing lanky or pale, it's getting too little light.
- Soil Temperature Hack: The 60°F soil temperature requirement isn't just about germination—it's also when your squash plants start developing roots aggressively.
Frequently asked questions
Got questions about growing or using yellow squash with green stripes? You're not alone!
Here are some of the most common queries—plus quick, practical answers to help you grow like a pro.
How do I tell if my yellow squash with green stripes is ripe?
Look for firm, glossy skin and a diameter of about 3–6 inches. The stripes should be vibrant, not dull, and the stem end should feel slightly soft when gently pressed. Overripe squash turns rubbery or develops soft spots—harvest before that happens!
How long does it take for yellow squash with green stripes to mature?
From seed to harvest, expect 45–55 days in warm climates. If you’re starting indoors, add 2–3 weeks for seedlings. Pro tip: Plant after the last frost when soil is at least 60°F (15°C)—cold soil slows germination!
Can I substitute yellow squash with green stripes for zucchini in recipes?
They’re nearly identical in texture and flavor, but yellow squash has a slightly sweeter, nuttier taste. Swap them 1:1 in grilling, sautéing, or baking. Bonus: The stripes add visual flair to dishes like ratatouille or fritters!
What should I do if my squash plants have holes or chewed leaves?
Squash bugs or cucumber beetles are likely culprits. Act fast: Handpick pests (drop them in soapy water), use row covers early, or spray with neem oil. Prevention tip: Rotate crops yearly to break pest cycles.
Can yellow squash with green stripes grow in containers?
Yes! Choose a 5-gallon container with drainage and support a trellis (they’re vining!). Ensure full sun (6+ hours/day) and well-draining soil. Dwarf varieties like ‘Eight Ball’ thrive in pots—perfect for balconies or small spaces!
Why are my flowers falling off before producing squash?
This usually means stress—check for:
- Pollination issues: Hand-pollinate with a brush if bees are scarce.
- Heat stress: Provide afternoon shade in extreme heat (85°F+/30°C+).
- Nutrient deficiency: Feed with compost or a balanced fertilizer (10-10-10).
Give your plants a little TLC, and they’ll bounce back!
Wrapping up and next steps
Growing yellow squash with green stripes is a rewarding journey that brings vibrant color and fresh, homegrown produce to your table! 🌱 With the right sunlight, soil, and care, you’ll enjoy a bountiful harvest—whether you’re a seasoned gardener or just starting out.
Now that you’re armed with expert tips, roll up your sleeves and plant those seeds—your garden (and taste buds!) will thank you.
Ready to take the next step? Mark your calendar for planting season, prep your garden beds, and watch your striped squash thrive. Happy growing! 🌞