Vegetables
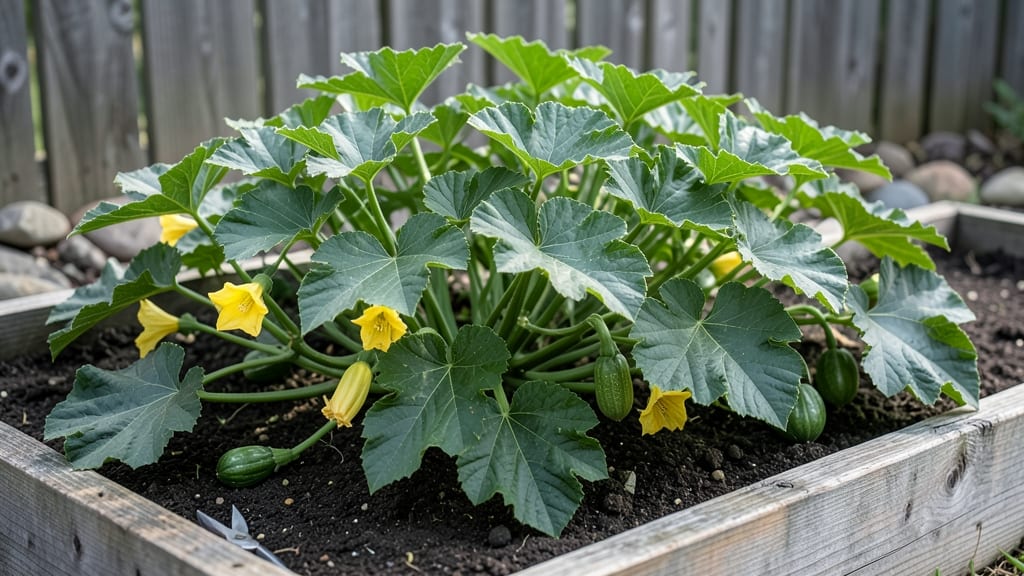
Growing small green squash in containers is the fastest way to turn a sunny corner into a productive mini-farm. 🌱 I’ve grown zucchini and scallop squash this way for years, and the secret to fast germination lies in the right soil warmth and moisture balance—no fancy equipment needed.
The key is starting with 50°F soil (use a thermometer or wait until nighttime temps stay above 60°F) and planting seeds just 1 inch deep.
Bush varieties like ‘Eight Ball’ or ‘Patio Star’ thrive in 5-gallon containers, while vining types need 10+ gallons—both produce prolifically if you keep them well-watered and fed.
Within 3-4 weeks, you’ll see those first true leaves, and by mid-summer, vines will sprawl with bushy growth and squash galore. What you’ll end up with is a steady harvest of crisp, tender squash—perfect for stir-fries or grilling—without the space or weeding hassle of an in-ground plot.
The plants stay productive for 8-10 weeks, and with proper care, you’ll avoid common pitfalls like blossom-end rot or powdery mildew. This method works for balconies, patios, or even windowsills with enough light.
Let’s get those seeds in the ground—literally or in containers—and turn your green space into a squash powerhouse.
📚 In This Guide
- What you need
- Instructions
- Tips and common mistakes
- Wrapping up and next steps
What you need
- ● Small green squash seeds: 3–5 seeds per container (or 1 seed every 2–3 feet in a garden bed). Choose a fast-maturing variety like ‘Early Prolific’ or ‘Eight Ball’ for quick harvests!
- ○ Containers (optional but ideal): 5-gallon fabric pots or large plastic containers (at least 12–18 inches deep and wide).
- ● Drainage holes are a must—no soggy roots here!
- ● Potting mix: 1 bag of high-quality, well-draining vegetable or container mix (avoid garden soil—it compacts too much!).
- ● Compost or worm castings: 1–2 cups per container to boost nutrients.
- ● Balanced fertilizer: 5-10-10 or organic options like fish emulsion (follow package rates).
- ● Gloves (to keep hands clean while handling soil and seeds).
- ● Trowel or small shovel (for planting seeds and transplanting seedlings).
- ● Watering can with a gentle spray nozzle (or a hose with a fine mist setting).
- ○ Mulch (optional): Straw or shredded leaves to retain moisture and suppress weeds.
- ● Sunny spot: At least 6–8 hours of full sun daily (containers can be moved, but garden beds need permanent placement).
- ● Patience (but not too much!): Small green squash germinates in 5–10 days—fast for a veggie! 🚀
- ● 🌡️ Soil temp: Wait until soil is at least 60°F (15°C)—cold soil slows germination.
- ● ✨ Warmth hack: Place containers in a sunny window or use a seedling heat mat for faster sprouts.
- ● 🎯 Thinning: Once seedlings have 2 true leaves, thin to the strongest plant per container.
Step-by-Step instructions for growing small green squash in containers
Here's how to coax fast germination and bushy vines from your squash plants—no sprawling garden required.
🌱 Step 1: Prepare Containers and Soil for Optimal Germination
Choose 5-gallon containers with drainage holes—squash roots need room to spread but hate soggy feet. Fill each with 1/3 compost (for nutrients) and 2/3 high-quality potting mix (for aeration). I like to mix in a handful of perlite to prevent compaction, which is crucial for those fast-growing roots.
Moisten the mix until it feels like a damp sponge—not dripping, not bone-dry. Press down lightly to remove air pockets, but don't compact it. The goal is soil that holds moisture but lets roots breathe. Squash seeds germinate fastest at 75-85°F, so if your space runs cooler, place containers on a seedling heat mat for that extra warmth boost.
🌱 Step 2: Plant Seeds at the Right Depth and Spacing
Drop 2-3 seeds per container about 1 inch deep—too shallow and they won't germinate; too deep and seedlings struggle to reach light. I use my finger to make small holes, then tap the seeds in gently. Cover with soil and mist lightly with water until the surface looks uniformly damp.
Place containers in a bright, warm spot (like a south-facing windowsill) and cover with a clear plastic dome or plastic wrap to trap humidity. Check daily for condensation—if it fogs up, you've got the moisture right. Germination happens in 5-10 days, but don't be surprised if it takes 12-14 days in cooler rooms. Patience here pays off with stronger vines later.
☀️ Step 3: Provide Light and Support for Bushy Growth
As soon as sprouts appear, remove the dome and move plants to 6+ hours of direct sunlight daily. A grow light works in a pinch, but natural light gives better flavor. I stake each plant with a 3-foot bamboo stake right away—squash vines grow fast, and supporting them early prevents sprawl and breakage.
When seedlings have 2 true leaves (not the first tiny cotyledons), thin to one strongest seedling per container. Snip the others at the base with clean scissors—don't pull, or you'll disturb roots. This might seem harsh, but crowded plants compete for nutrients and grow leggy. After thinning, water at the base to avoid wetting leaves, which invites disease.
💧 Step 4: Water and Fertilize for Fast, Healthy Vines
Water when the top 1-2 inches of soil feel dry—squash roots need consistent moisture but hate soggy conditions. I use a watering can with a narrow spout to direct water to the base, avoiding leaves. Mulch with 1 inch of straw to retain moisture and keep roots cool, which prevents bitter fruit later.
Feed with a balanced liquid fertilizer (like 10-10-10) every 2 weeks once vines start running. I dilute it to half-strength—too much fertilizer burns roots and leads to leafy growth with no fruit. Watch for yellowing leaves as a sign of over-fertilizing. Squash are heavy feeders, but moderation is key for compact, bushy vines.
✂️ Step 5: Prune and Harvest for Continued Production
When vines reach 3-4 feet, pinch back the main stem just above the 5th leaf to encourage bushier growth. This might seem counterintuitive, but it redirects energy into lateral branches where fruit forms. Remove any yellow or diseased leaves immediately—squash plants are prone to powdery mildew, and pruning improves airflow.
Harvest small green squash when they're 4-6 inches long—waiting longer makes them tough and seedy. Use pruning shears to cut stems cleanly, leaving a small stub. I harvest every 2-3 days in peak season to keep plants producing. The more you pick, the more they'll give you—it's their growth signal to keep flowering.
Tips & tricks for perfect small green squash growth
These game-changing insights will help you skip the common pitfalls and grow bushy, productive squash plants with minimal fuss.
Soil Temperature Secret: The 75-85°F range for germination is non-negotiable—this is where squash seeds activate their growth hormones most efficiently. I've found that placing containers on a seedling heat mat for the first 48 hours after planting can shave 2-3 days off germination time, especially in cooler homes. If your space runs cooler than 70°F, consider using a small greenhouse tray or even a heated propagation mat designed for seedlings. The key is maintaining consistent warmth during those critical first days.
Thinning Technique: When you're thinning to one strongest seedling per container in Step 3, I recommend using clean, sharp scissors rather than pulling seedlings by hand. This prevents disturbing the root systems of the remaining plants, which can set them back for days. Look for seedlings that are slightly behind in growth—these are often the ones that will compete most aggressively with your chosen plant. After thinning, I like to remove the discarded seedlings immediately rather than leaving them to decompose in the soil, which can attract pests.
Light Optimization: While 6+ hours of direct sunlight is the minimum, I've noticed that squash plants actually thrive with 8-10 hours of sunlight daily, especially during their fruiting phase. If you're using grow lights, position them just 6 inches above the plants and keep them on for 12-14 hours per day. The light spectrum matters too—full-spectrum LED grow lights that include red and blue wavelengths will give you the best results for both leafy growth and fruit development. Rotate your containers every few days to ensure even light exposure all around the plant.
Pruning Strategy: When you pinch back the main stem at the 5th leaf in Step 5, you're essentially telling the plant to focus its energy on lateral branches where the fruit will develop. This technique works particularly well for bush varieties like small green squash. I've found that making this pinch when the plant reaches exactly 3 feet (rather than waiting for 3-4 feet) gives you more control over plant shape and often results in earlier fruit production. Just be sure to use your fingers or clean pruning shears—never a dull blade that can tear the stem.
Pro Tips for Small Green Squash
- These game-changing insights will help you skip the common pitfalls and grow bushy, productive squash plants with minimal fuss.
- Soil Temperature Secret: The 75-85°F range for germination is non-negotiable—this is where squash seeds activate their growth hormones most efficiently.
- Thinning Technique: When you're thinning to one strongest seedling per container in Step 3, I recommend using clean, sharp scissors rather than pulling seedlings by hand.
Frequently asked questions
Got questions about growing small green squash?
You’re not alone! Here are answers to the most common queries to help you grow a thriving harvest—even in containers.
How long does it take for small green squash seeds to germinate?
Small green squash seeds typically sprout within 5–10 days after planting, especially in warm soil (70–90°F). For faster germination, keep the soil consistently moist and place pots in a sunny spot. If seeds don’t sprout within 2 weeks, they may need replanting.
When is the best time to harvest small green squash?
Harvest when squash are 3–6 inches long and firm to the touch, usually 45–55 days after planting. Use pruning shears to avoid damaging vines. Pick regularly to encourage more production—overripe squash can turn woody or bitter!
Can I grow small green squash in containers without trellising?
Yes! While bush varieties (like ‘Eight Ball’ or ‘Patio Star’) thrive in 5-gallon containers without trellising, vining types may sprawl. Use large pots with good drainage and prune excess vines to keep plants compact. Add compost for nutrients to support bushy growth.
What should I do if my squash leaves develop holes or yellow spots?
Holes or yellowing leaves often signal pests (squash bugs, aphids) or disease (powdery mildew). Remove affected leaves, spray plants with neem oil, and improve airflow. For severe infestations, use row covers or insecticidal soap. Rotate crops next season to prevent recurrence.
Are small green squash good for beginners? Why or why not?
They’re fast-growing, prolific, and forgiving—perfect for new gardeners. Varieties like ‘Zucchini’ or ‘Cocozelle’ produce abundantly with minimal fuss. Just ensure full sun (6+ hours/day) and consistent watering. Plus, their small size makes them ideal for containers and small spaces!
Pro Tip:
For extra sweetness, harvest in the morning when sugars are highest. Store squash in a cool, dry place (not the fridge) for up to a week—though they’re best used fresh!
Wrapping up and next steps
Growing small green squash in containers is totally doable—even for beginners! 🌱 With the right soil, sunlight, and a little patience, you’ll soon enjoy a thriving bushy vine and a bountiful harvest.
Whether you’re saving space on a balcony or just love the convenience of container gardening, these versatile veggies reward your efforts with delicious, homegrown produce.
Ready to dive in? Start by gathering your supplies, then pick a sunny spot and plant those seeds. Happy gardening! 🌿